Solar Panel Installation At Home

solar panel installation

Installation of solar panels may sound like a huge upfront cost but in the long run, it is an investment that can yield gains forever – not only personal but also environmental. Solar panels can be installed either on your own or by taking some help from an EPC installer.

Here is a solar panel installation guide for off-grid solar panels and you will be quite happy to know that the process is easy and simple. A solar buyer may go through this blog in order to understand ‘how to install solar panels at home’ on their own.
How To Install Solar Panels? DIY Steps To Solar Energy

Solar Panel Installation At Home 1

When you think of solar installation, it may seem like a huge task but if you understand the process, it is really quite simple. These steps will help you to install a solar panel at your home all by yourself .
Step 1: The facing of the solar panel and its direction

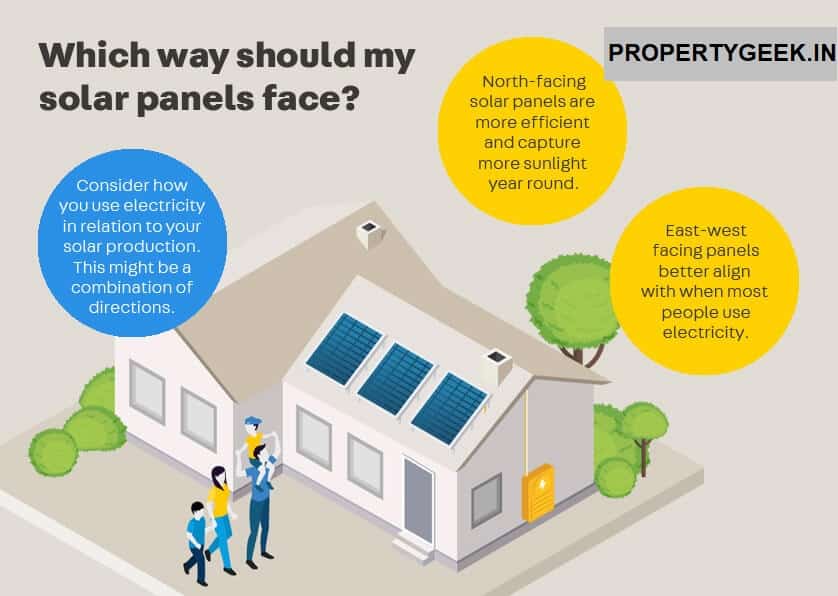
The facing of the solar panel and its direction
  • The base of the complete solar panel system should be entirely provided by the panel’s mounting structure. You must ensure that the panel is fastened properly to your rooftop of the house or the commercial establishment and is also sturdy.

Aluminium is a general material used for making mounting structures. The way your solar panel will perform depends completely upon its direction, which means the direction the panel is facing.
  • The direction that is best for solar panels is if it faces the south, this is because it will get maximum sunlight. Even the East or West direction will work well.
  • You should avoid pacing the panel in the North direction because the Northern Hemisphere is where India lies which translates to non optimal sunlight.
  • For fixing the solar panels you can use the Rooftop Solar Mounting Structure. Both polycrystalline and monocrystalline panels can be fixed to the roof, this 1 kW structure is ready to use, and can be connected to almost 4 panels with solar electric power of 270 watts.

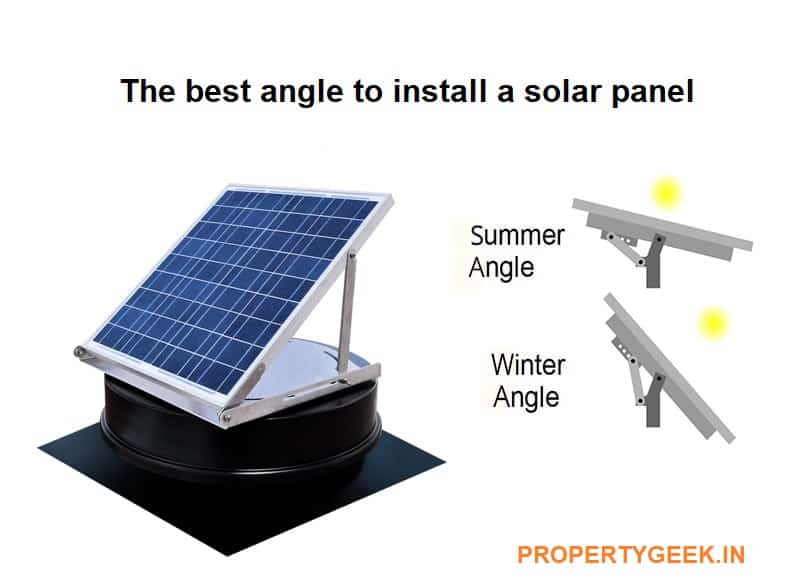
The best angle to install a solar panel in:

The best angle to install a solar panel
  • While installing a solar panel you should be concentrating on the tilt angle of the solar panel, meaning, the panel’s angle that is between the solar module and horizontal ground.
  • You should decide this angle according to your location’s latitude, this principle applies almost with every solar panel.
  • The solar power that you receive depends upon the angle at which the modules are placed. For increasing the conversion efficiency you may also try using a solar tracker.

The leading cities of India and their latitudes (States ) -

Zone -1: Punjab, J&K, Uttarakhand, Himachal Pradesh,– 30-360

Zone – 2: UP, Rajasthan, Haryana, Delhi, North EASTERN STATES Bihar, – 24-300

Zone – 3: MP, Gujarat, West Bengal, Jharkhand, Chhattisgarh, Orissa, Maharashtra – 18-240

Zone – 4: Tamil Nadu, Telangana, Karnataka, Kerala, AP – 12-180
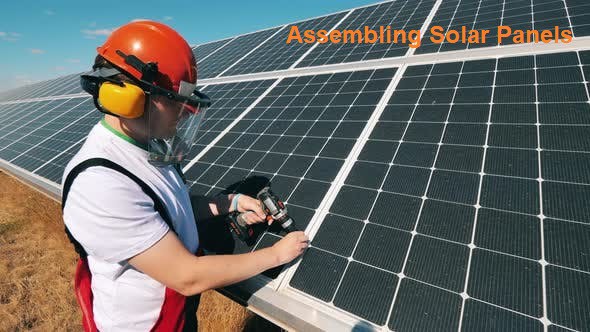
Step 2: Assembling Solar Panels

Solar Panel Installation At Home 2

Only if you fix the solar structure accurately, can you connect the solar modules with it.
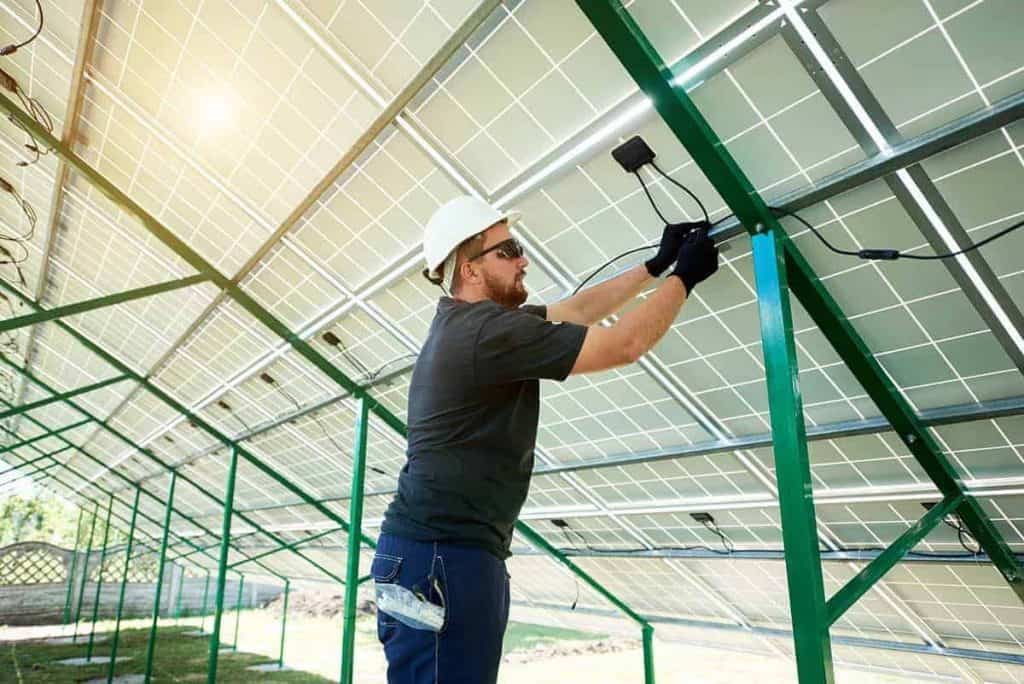
  • You must also ensure that every nut and bolt of the solar module is fixed properly with the solar structure for securing the panel properly as well as last for a long time.

Step 3: Electrical Wiring Of Solar Panel

Electrical Wiring Of Solar Panel

If you want to install solar panels the connectors used are MC4 connectors. However, there are various universal connectors that you can connect to any kind of solar panel.
  • The wiring of the solar array can be made simpler as well as faster if you use MC4 connectors. You can get a solar module that is modern as it will have wire leads and even an MC4 connector at the end. Or else you can get a solar module that has an in-built junction box with wires at the back of it.
  • For a series connection, all you need to do is get a connection between the wires, that is, the positive wire (module 1) and the negative wire (module 2).
  • You can create a parallel connection too, that will maintain the voltage of the panels, on the other hand in a series connection the voltage increases.

Step 4: Connecting The Solar Panel With Solar Inverter

Solar Panel Installation At Home 3

One of the biggest advantages of a solar panel is not only that it conserves the environment but also that it can significantly help cut down electricity bills.

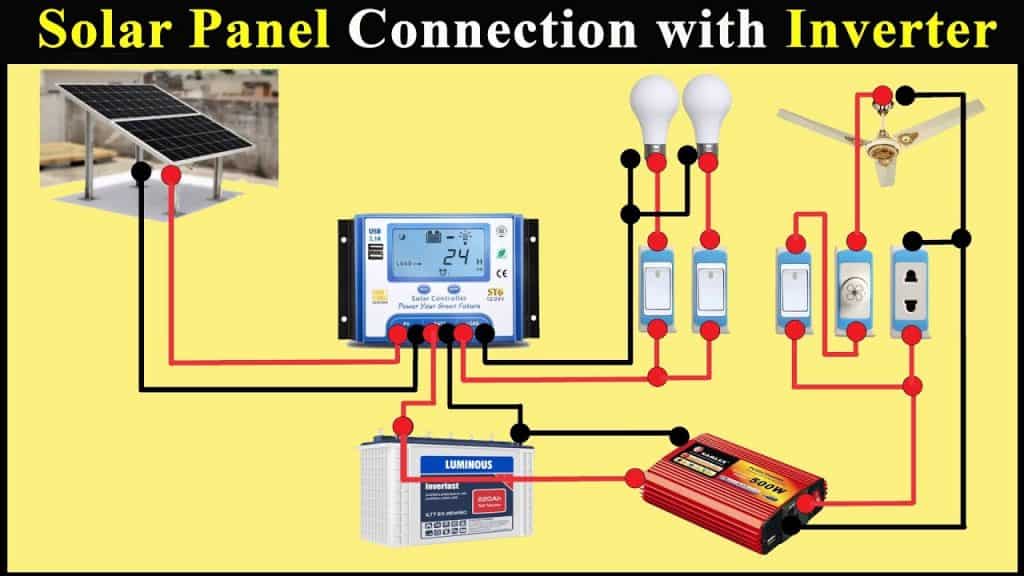
  • In order to cut your bill further, you must connect a backup inverter with the solar panel. You can take the solar panel’s positive wire and connect it with the inverter terminal’s positive side, similarly, take the negative wire and connect it with the inverter’s negative side.
  • You may try different connections too, such as a wire connection with the battery and an output connection with the inverter’s wire.
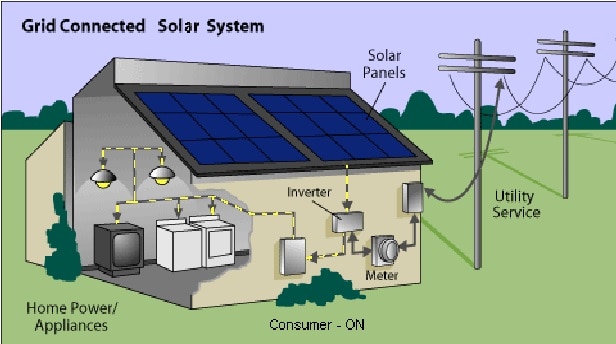
  • Overall, Solar batteries, Grid input, and Solar panels are all connected with solar inverters for producing electricity.

You’d need to take some safety measures to do these connections like, always remember to turn off the inverter while you connect the wires.
Step 5: Connecting The Solar Inverter With The Solar Battery

Connecting The Solar Inverter With The Solar Battery

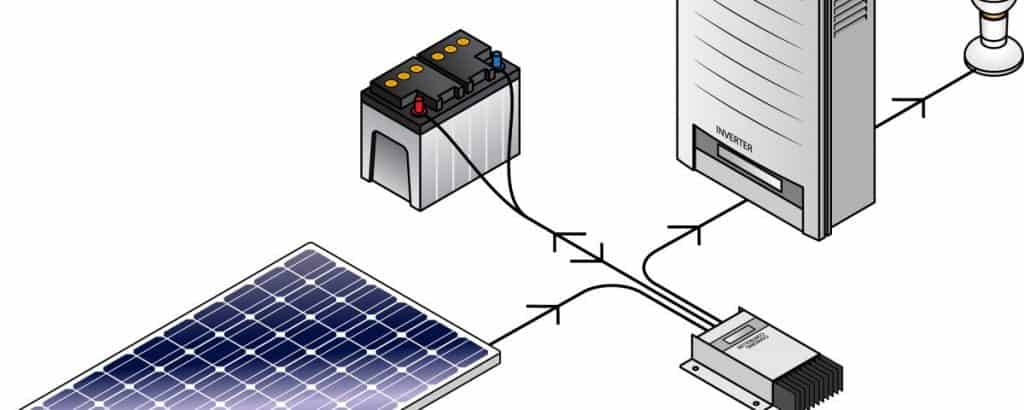
If your solar panel system is a grid-off system, a battery will be necessary for storing power backup.
  • You’ll need to make a connection between the battery and the solar inverter in order to recharge it with a grid and solar panel.
  • The battery’s positive terminal has to be connected to the inverter’s positive side and vice versa.

Step 6: Connecting The Solar Inverter With A Grid Solar Panel

Connecting The Solar Inverter With A Grid Solar Panel

For connecting the solar inverter with the grid simply you just need to plug it into the switchboard’s main power, this will allow you to get power from that grid. You also have to connect the output wire to a board that supplies electricity to your home.

For calculating the excess energy that is generated from your solar system, you need to get a metering device installed. You will be required to draw a connection between the positive wire from your metering device to the negative wire of your inverter, and this connection will go through the line terminal of both devices.

Step 7: Starting The Solar Inverter Via Solar Grid & Panel

After you complete connecting all the wires, you have to shift to the mains. The solar panel will show a digital display that will indicate the number of solar units that are generated in the entire day, the supply current (amp) and volt generated from the panel, etc.

Solar Panel Installation: Do's & Don'ts

The day you install a solar panel, from that very day it can generate electricity for almost 25 years, which will let you save money that you spend on electricity. But if you want to use solar panels effectively you have to install them properly.

Here are the 5 most common mistakes while installing a solar panel-

  • The mounting structure of the solar panel must be made from GIA: The panel’s iron stand may not be durable and long-lasting because these aren’t rust-proof. Hence, it is recommended to use GIA Stands for the installation of your solar panel.
  • The solar panels must be fixed properly: The mounting structure plays an important role when it comes to fixing the solar panel, and getting the perfect placement, or else the panel tilts. This is why the mounting structure needs civil work, also take care of the fastener’s brand, you may go for brands like Anchor.
  • Wiring the solar panel to MC4 Connector: Most people tend to connect the solar panels with tapes, and this must be avoided – always use an MC4 connector. These connectors will help you join everything manually, and one of the benefits is they can only be unjoined with the help of a tool, which ensures that the circuit doesn’t break up.
  • Installation of the solar panels at 300 Degree: Always install a solar panel at an angle of 30 degrees in order to get complete efficiency. If you install it at this angle it will lead to the generation of maximum solar power. The best direction to place a solar panel is southwest.

Use of 3 Earthing stands: Earthing will protect the solar system, it will also protect against overload, direct extra electricity, at the same time stabilize the voltage, and prevent mishaps of any kind.

Final Thoughts

So the answer to ‘how to install solar panels at home’ is finally answered. Now you know solar panels installation at your house is not a hassle as many people think, which is why people generally do not care about getting solar systems installed. Even if someone thinks about getting one installed at the house they reach out to various companies who provide installers. However, if you follow the simple steps that are mentioned above you can easily install a solar panel at your home on your own.

There is no doubt that solar panels have a lot of benefits, they will save your electricity bill and money. Moreover, these do not require any outside supply, so the cost of energy production and maintenance is zero.

How To Install Solar Panel FAQs

1. What is a solar inverter ?

A solar inverter or a PV system is basically a kind of electric converter that helps in converting the photovoltaic solar panel's DC (direct current) output to utility frequency current.

2. What is a solar array ?

The combination of a lot of solar panels will create an array, the size generally depends on the place you live, your roof's position, and the amount of energy your family needs.

3. Do we need solar installers ?

You can always try to install a solar panel by yourself as it is quite easy, but if you think you won't be able to install one you can always take the help of a solar installer.

4. How much does a solar panel cost ?

The price of PV systems that are connected to the grid is around 50,000-75,000, however, the price may vary from one company to another. Also remember this is a one-time investment as maintaining solar panels is really easy.

5. What are the best companies in India for buying solar panels ?

You can buy a solar panel from various brands in India: ● Luminous ● JinkoSolar ● Waaree Solar ● Vikram Solar ● Tata Power
Property Geek

Property Geek

Share now!

Sunnidhi farm

Here's more to look into!

Leave a Reply

Your email address will not be published. Required fields are marked *

Sunnidhi farm

ENQUIRY